- Video
- Inside the Operating Room: Placement of Sientra Shaped Breast Implants
{{ showTranscript ? 'HIDE' : 'SHOW' }} TRANSCRIPT
Here we are now in the operating room. Our patient, Haley, is asleep. She's being carefully monitored by Dr. Bradford [SP]. That's his job. He's going to focus on anesthesia. I'm going to focus on her surgery.For Haley's surgery, we've chosen an underneath the fold incision. This is probably the best approach for this type of implant. These implants are already filled, and we need a big enough incision so that we can get the implant into the pocket without excessive trauma.
Now I'm creating the pocket for the implant, and as I mentioned earlier, this is a very precise section because you want the pocket to match the dimension of the implant very closely. I'm looking very carefully at my external markings to make sure that I stay within the bounds of the area of deception that outlined before surgery. Careful preoperative planning and marking helps to ensure that we get the best result.
So now this deception is completed, and when done properly, this should be an essentially bloodless dissection. Irrigation. So I'm going to irrigate the pocket with an antibiotic solution. The antibiotic solution helps make sure there aren't any even the smallest amount of bacteria there, which could potentially reside on our implant and cause her to have capsular contracture. So we take all of these precautions as we do this dissection to make sure that that pocket is absolutely as clean as possible.
We're going to do a sub-muscular positioning of the implant. This is also known as dual plane. Dual plane means that part of the implants underneath the muscle and then part of it is underneath the fascia. After the dissection, we put in local anesthetic, a long-acting local anesthetic so patients have very little discomfort when they wake up in the recovery area.
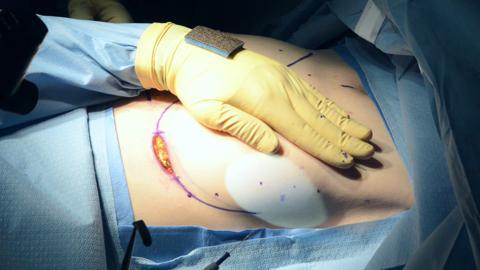
So we have our shaped implant here, which we're now going to insert through the incision, and this is a bit of a tight fit. We just want to carefully move the implant from side to side as we get it through the incision. So we've got the implant in. We're just positioning it properly. I want to make sure that the implant is appropriately oriented, so I'm looking at that white line, and that the tissue is re-draped smoothly over the surface of the implant so there's no wrinkles or folds.
Okay, we're going to sit her up now and take a look. So I'm going to adjust the pocket here a little bit. On this side, it looks a little tight on the outside, but everything looks nicely positioned so there's really not too much more to do except close her up.
The first layer of tissues goes in what's called the fascia, and that's really the strength layer that holds the implant in position. The first two layers of sutures are absorbable, and then the final layer is a non-absorbable suture. It's the least reactive suture that they make. Everything looks good. We just seal up the incisions with skin glue. I don't need to put any bandages on it. It's a nice, clean, tidy operation. As soon as she wakes up, we'll take off the drapes and we'll put her in a bra and she'll be headed to the recovery room.
Inside the Operating Room: Placement of Sientra Shaped Breast Implants
Dr. Braden Stridde takes us into the operating room with his patient as she receives her breast implants through a small incision at the inframammary fold.